

Your first connection
Connect QoreDB to your first database in under a minute. Paste a DSN, fill the form, or start with a local SQLite file.
QoreDB has no project setup, no global configuration to fill in, no account to create. You launch the app, add a connection, and start querying. This page walks you through that flow.
The two ways to add a connection
You can create a new connection in two ways. Both end up with the same normalized configuration, encrypted in the local vault.
Paste a DSN/URL. Fastest path. If you have a connection string already (from your .env, your hosting provider's dashboard, or your team wiki), paste it and QoreDB parses it for you. Driver auto-detection picks the right engine: postgresql:// becomes Postgres, mongodb+srv:// becomes MongoDB Atlas, and so on.
Fill the form. Driver-specific form with separate fields for host, port, user, password, database, SSL/TLS, and any options that engine supports. Useful when you don't have a DSN handy or when you want to inspect every field explicitly.
You can switch between the two modes inside the connection dialog at any time.
Walk-through: connect to a database
-
Click the + button in the connection sidebar (bottom-left).
-
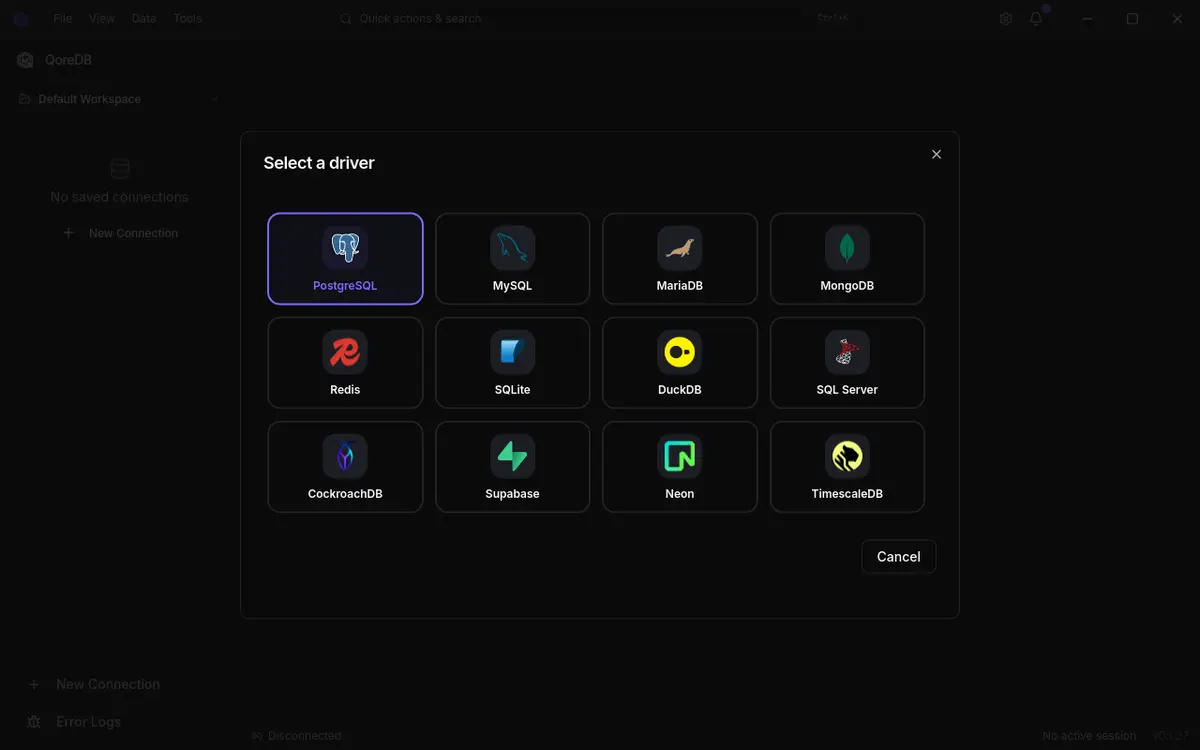
Choose your database engine.
-
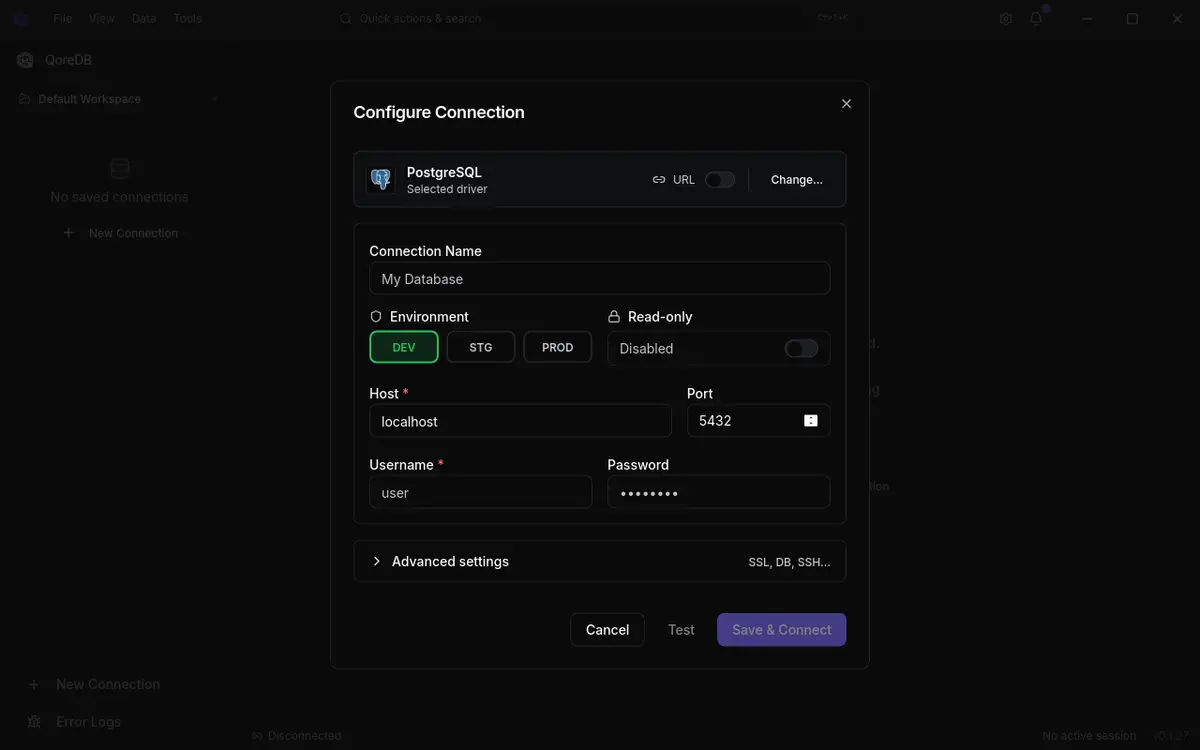
Either:
- Toggle Use URL and paste your connection string, then click Parse, or
- Fill the form fields directly.
-
Click Test connection to verify QoreDB can reach the database.
-
Choose an environment (development, staging or production). The default is
development. The environment drives a color-coded badge in the UI and gates production mutations behind a typed confirmation. See Environments for the full behavior. -
Click Save. The connection appears in the sidebar.
-
Double-click the connection (or click Connect) to open a session and start exploring.
DSN examples per driver
Here are the formats QoreDB accepts for the most common engines:
postgresql://user:password@host:5432/database
postgresql://user:password@host:5432/database?sslmode=require
A complete reference of all supported URL formats, including SQL Server, Redis, DuckDB, and per-driver options, lives on the Connection URLs page.
Try it locally with SQLite
If you don't have a database to connect to right now, the easiest way to play with QoreDB is to point it at a local SQLite file. SQLite needs no server.
- Click + in the connection sidebar.
- Pick SQLite.
- Click Browse and either select an existing
.db/.sqlitefile, or type a path to a new file. QoreDB will create it for you. - Click Connect. You're in.
From there you can run CREATE TABLE, insert rows, and explore the full editor without needing a network connection.
Save the connection in the vault
When you save a connection, the password (and any sensitive option like an SSH key passphrase) is stored in the vault: an encrypted store backed by your operating system's native keychain.
- macOS: Keychain Access
- Windows: Credential Manager
- Linux: Secret Service (GNOME Keyring, KWallet)
The vault uses Argon2 for key derivation. You can also enable an optional app lock that requires a passphrase every time you launch QoreDB. See Vault encryption for details.
SSH tunneling
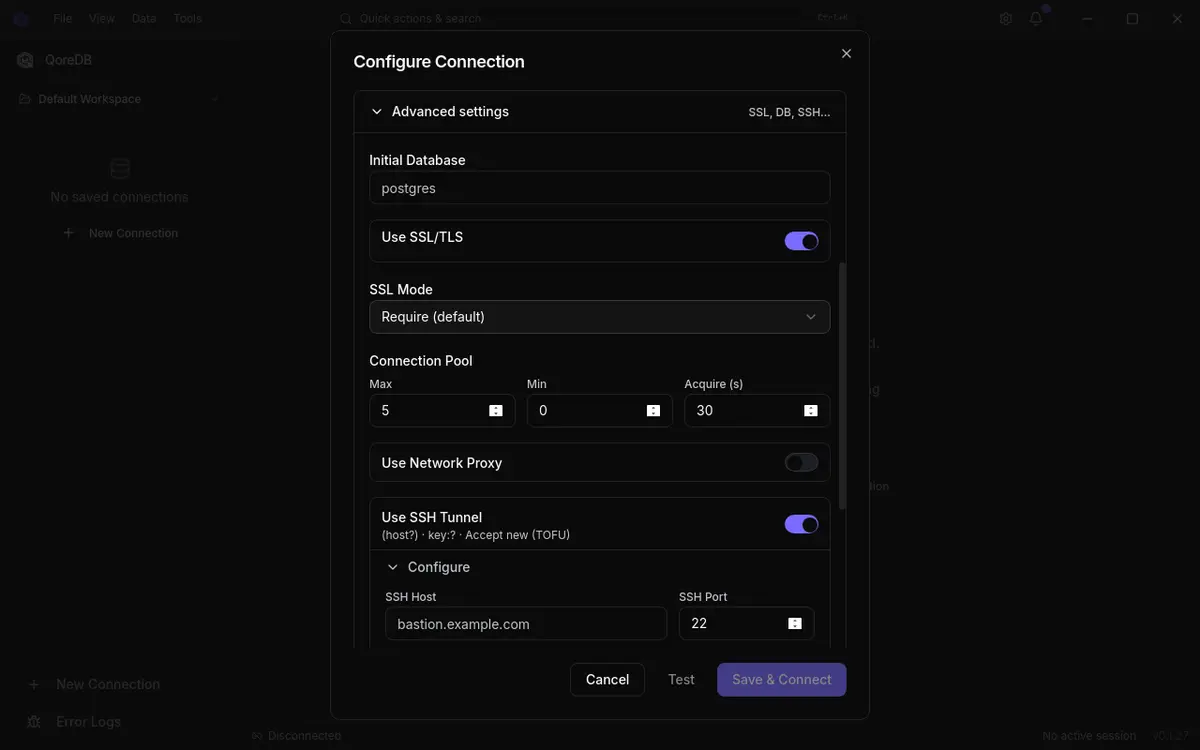
If your database is behind a bastion or a private network, expand the SSH tunnel section of the connection dialog. QoreDB supports:
- Standard SSH host/port, with username/password or key file authentication
- Proxy jump through a chain of intermediate hosts
- Custom SSH options
QoreDB uses a native OpenSSH client under the hood, so behavior matches what you would get from ssh -L on the command line.
See SSH tunneling for the complete guide.
Common issues
Where to go next
- Interface tour: get familiar with the main UI
- Connections overview: driver-specific guides
- Vault and profiles: group, organize and switch between connections
最新情報をお届けします
ニュースレターに登録して、リリース情報、新しいドライバー、技術チュートリアルを受け取りましょう。